
Make a Silver Seashell Frame: A Preschool Craft with Shells from the Beach
0 CommentsBy Lostcheerio on Tuesday, August 28, 2007 at 9:41 AM.
Step 1: Wash the shells.
I had a big bucket of shells that were pretty much straight from the beach. Sand in them, bits of seaweed, random ocean gunk, etc. I put the bucket in the sink and turned on the water. Sadie and Phillip washed the shells and each chose a bowl full to use in their projects.
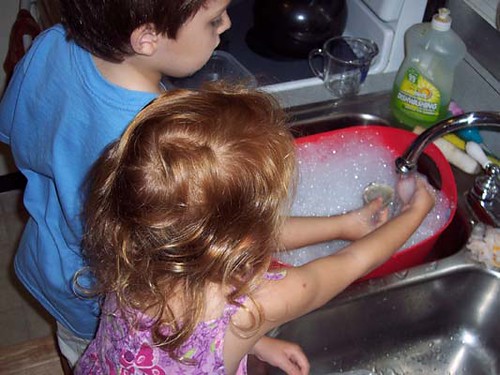
This was definitely the kids' favorite part of the whole thing. They liked clinking their hands around in the bucket of shells and water, they liked picking out different variations of color and shape, and we talked about the creatures that had inhabited the shells, why they were shaped how they were shaped, why they were sandy, why some had ridges and some didn't, etc. The nature lesson was good, but I think the tactile sensation was better.
Step 2: Paint the shells.
When they had their shells picked out, I laid paper towels on the table and set their bowls next to their workspace. They each chose ten shells, which we laid out in a row and numbered, then ten more, another row, then ten more. We counted to thirty, we counted by ten to thirty, we talked about three groups of ten making thirty, and we exploited the math moment in other ways. Then we painted.
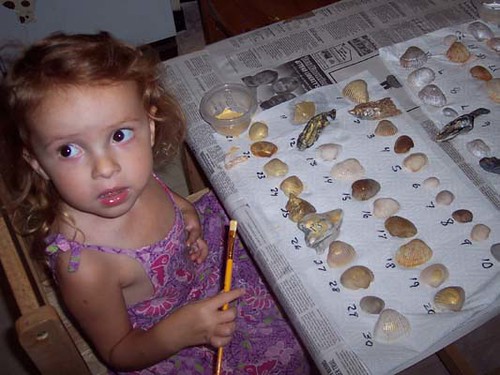
Painting shells is complicated because of the ridges. We tried, with varying degrees of success, to paint with the ridges rather than across them, to make an even, smooth layer of paint. We also tried to cover the whole shell.
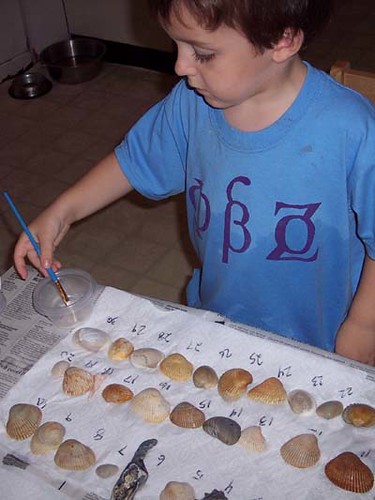
We used pearl white and metallic gold paint, and then came behind with silver and gold glitter paint. I like glitter paint 50 times better than shaking loose glitter onto glue. It's so much easier to control, so much less messy, and so much less likely to get into your eye and drive you crazy for the rest of the day.
Step 3. Arrange the Shells on the Frame.
After the kids chose their favorites and organized them on the frame, I came behind with a glue gun and attached the shells. We used an unfinished wooden frame, which we later varnished with spray varnish, because the glue and the shells will stick better to an unpainted wood surface than to paint or shellac.
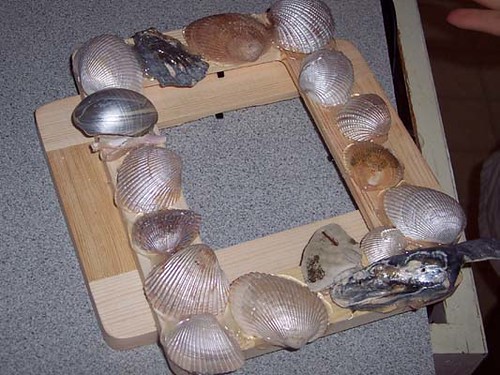
Another example of the quiet, private nature of homeschool learning. Looking at the finished frame, some silvery shells stuck onto a wooden rectangle, you don't see the math, the marine biology, the joy in the tactile sensation. While school teachers have to focus on deliverables, proofs, and evidence, the homeschool teacher has her own experience, her own memory, her own relationship with the project and the moment, and there's no one to prove it to, no need to quantify it.
Of course the homeschool teacher also has her homeschool blog where she occasionally does record it, quantify it, and provide all the evidence she likes.
Labels: children, counting, crafts, kids, painting, phi bensa zoe, preschool, projects, shells
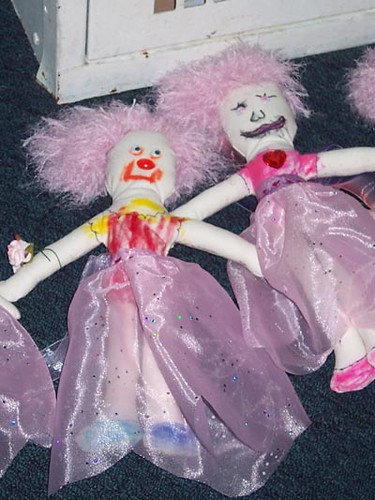
And if anyone feels the need to remind me that I did run screaming into the night a few times, recall that at least I remembered my address and took my keys with me.
Materials:
A reasonable amount of plain muslin.
Pale colored thread.
A Sharpie!
Yarn for hair. We used a very silly, fluffy fun-fur type.
A sewing machine.
Some loverly pink organza.
Different loverly pink ribbons, 2 inches wide, cut about 15 inches long.
Jewels.
Googley eyes.
Non-permanent markers for the kids.
Tacky Glue. Small bottles the kids can manage.
Skinny ribbons, cut about 10 inches long.
Tiny bunches of pink roses on floral wire. We found 10 in a bunch for just a few dollars. Just cut apart the bunch and remove the floral tape and they'll be useable individually.
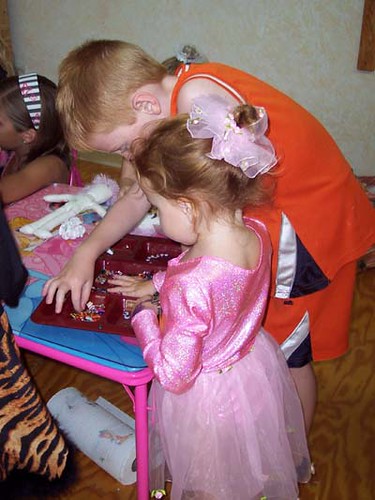
Making the Doll
1. Draw a template. The doll should be about 10-12 inches high, with a nice big
round head, and fairly thin, long arms and legs. Give yourself enough room to
turn and stuff the doll, but we don't want a fat baby ballerina here, we want a
nice long stringy ballerina. Our arms and legs were about an inch, an inch and a
half wide. It's nice to add a thumb sticking up and shape the foot so there's a
shoe.
2. Trace the template onto muslin with your Sharpie. It's good to sew one up and make sure you like it before you trace 20 of them.
3. Cut the dolls apart from each other. Don't worry about cutting too close to the sewing line -- just separate the dolls from each other. It's easier to sew if you have more room.
4. Set your sewing machine to a very small stitch length and sew around on the
Sharpie line. Leave a small hole for turning under one arm. About an inch and a
half will work.
5. Now trim the excess fabric down to very very close to the stitching line. Clip your curves, turn, and stuff
6. Finally, use a Sharpie to draw a leotard and shoes onto the doll. Do different necklines, different sleeve shapes and hems, etc, on the different dolls. Make the leotard one of those ones with legs that go halfway down to your knees.
Making the Hair
1. Make yourself a cardboard hair-winder. If you want short hair, the
cardboard hair-winder should be about 4 inches wide. For longer hair, go up to 6
inches.
2. Wind the hair around the hair-winder until you have a reasonable amount
of hair for a doll.
3. Slide the loop of hair off the cardboard and lay it on a scrap of
muslin. The more interesting and delightful your yarn is, the more irritating
and painful it will be to make the hair. Soft slippery fluffy hair is going to
give you a pain in your bum that feels like the bite of a horse.
4. Sew it down to the muslin, making sure that it doesn't spread out more
than a few inches. As you go down the hair, keep smooshing it under the pressure
foot, smooshing, and smooshing. The stitches you're sewing will separate the
bangs from the rest of the hair, so if you're making long hair, put your
stitches toward one end.
5. Turn the muslin-and-yarn wig over and trim the muslin down very close to
the stitching line.
6. Lay the wig on the doll and sew it on by hand. While you're doing your
handwork, you can stitch up the hole in the doll that you used to turn her and
stuff her. If you have any "gotcher armpit" jokes in you, now is the time to use
them.
7. Turn the doll upside down over a garbage can and clip open the loops of
hair. You're over a garbage can to stop the fluffs of hair from invading every
corner of your home. For this reason, take your scissors with you and go
outside, before you give her a good shake and then a nice haircut/trim to shape
up her hairdo.
8. After doing this hair, it's a good idea to clean out your sewing machine
a bit.
Making the Skirt
1. To make 21 skirts, I folded 1 yard of organza into thirds (12 inches
wide, 44 inches high) and cut the thirds into 7 pieces each (approximately
12 inches wide, 6 inches high). You could make them wider (more that 12 inches)
for more gather, or longer (more than 6 inches) if you have a longer doll.
2. Increase your stitch length all the way long and stitch down the top of
each skirt. Pull on the bobbin thread and gather the skirt up.
3. Cut your wide ribbon into pieces approximately 15 inches long. Fold the
center of the ribbon over the center of the skirt and sew into place so the
ribbon is wrapped over the gathered up part. I used a decorative stitch for this
-- hearts, flowers, you know the drill.
4. Now the skirt is done. If you're making more you can fancy it up with a
hem, or stitch the entire ribbon closed, or something, but if you're making a
lot, and you finish this part, give yourself a pat on the back and maybe a nice
big mug of rum. Or diet Coke.
Putting it All Together.
Now it's the kids' turn to take over. There are two ways to put this project together. I suggest the kit method for a smaller number of kids, the station method for a larger number.
The Kit Method
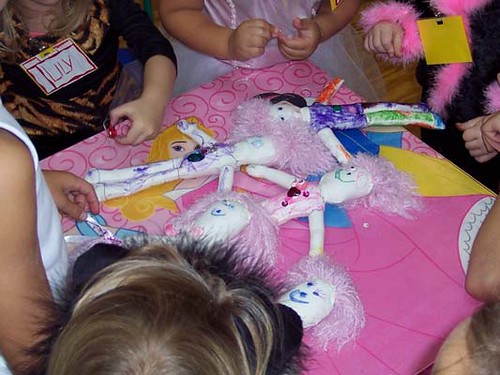
Into your large ziploc baggie goes 1 doll, 1 skirt, 2 googley eyes, a
handful of jewels, a skinny ribbon, and a rose. The child sits down at a table
with a communal marker bin.
1. First, she colors the face and leotard using markers. Non-permanent
markers are fine, because we're not going to be throwing this doll in the
washing machine, are we?
2. Next, she glues jewels onto the doll's body. Maybe emeralds around the
neckline. Maybe a giant sparkly heart right in the middle of the bodice.
Maybe diamonds in the hairline. A pearl on each shoe. Try not to glue
anything right around the waist where the skirt will tie on. Show the kids how
to do one dot of glue for each jewel, rather than splodging around a whole lot
of glue.
3. Tie on the skirt. Older children will be able to manage sticking jewels
onto the skirt too, but it's tricky, because the glue bleeds through the
organza.
4. Now tie the skinny ribbon around her neck in a bow, and clasp her hands
together and wrap the little rose around them, using the wire. If the child
doesn't want the hands clasped, you can just wrap the rose around one hand, like
a wrist corsage.
5. Allow glue under jewels to totally dry before the doll begins her career
as a toy.
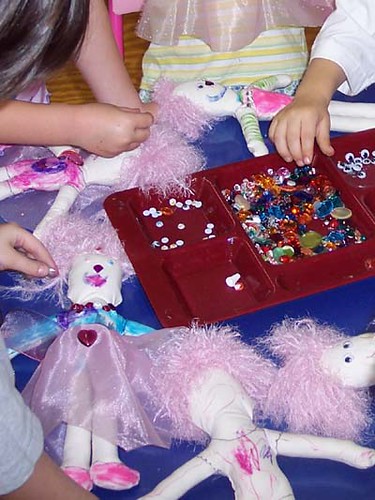
The Station Method
1. The Marker Station. Give each child just the doll and have her sit down
at a table with a communal marker bin and color the leotard, shoes, and
face.
2. The Sparkle Station. Put the jewels and googley eyes out in trays and
have an adult (or two or three) standing by to administer the glue as directed
by each child who comes to the station. You do the glue, the kid arranges the
jewels, the eyes, as they desire.
3. The Skirt Station. Pick out a skirt and tie it on the doll.
4. The Finishing Station. Tie the skinny ribbon around her neck and wrap a
flower around her wrist.
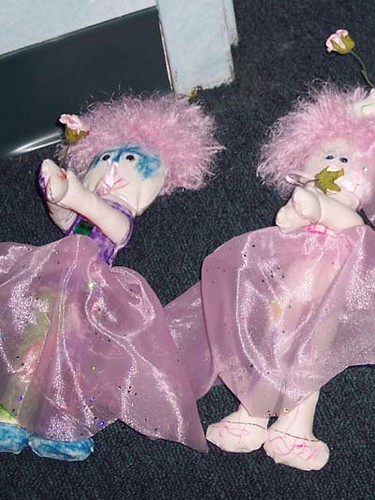
Done! Let the pretending begin!
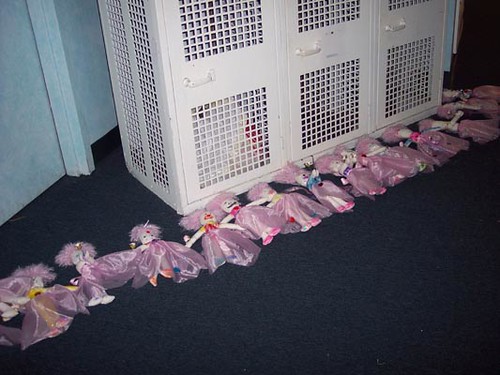
Thank you to Ahno who fought with that lousy muslin and that slippery pink hair, on and on into the night, and emerged triumphant. We prepped these projects for 20 children at ballet camp, and thanks to the cooperation of the teachers and volunteers, we had 20 happy children bouncing off with their own personal doll at the end of the day.
Labels: ballet, dolls, princess camp, projects, sewing
How to Make Custom T-Shirts at Home
0 CommentsBy Lostcheerio on Wednesday, May 02, 2007 at 11:50 AM.
I made six t-shirts for our small homeschool co-op with this method, and it worked great. I let Benny pick the color of the paint and Sadie pick the color of the shirt, but apart from that they weren't able to help too much because of the razors involved. Hey, you can't always make it a teaching moment. Especially when there are razors.
Supplies list:
T-shirts
Acrylic, permanent, unwashable paint
Paintbrush
Freezer Paper
Masking Tape
X-Acto knife
Iron and ironing board
Piece of cardboard as big as design
1. Make your design.
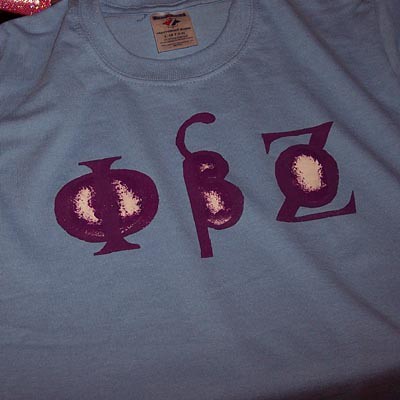
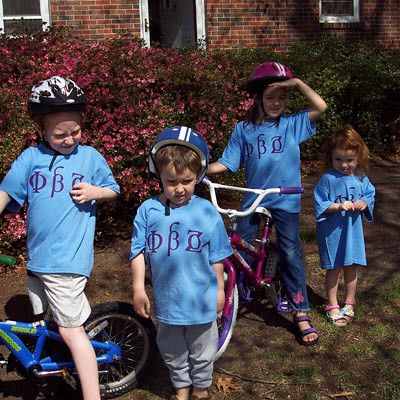
We named our co-op "Phi Bensa Zoe Academy" using our kids names to invent new and serious-sounding Greek letters. Then we invented the "new" Greek letters to go with, and that was the shirt. Whatever design you choose, print it out in black and white on a piece of paper. How complicated can it be? Depends how fussy you want to get with the cutting out and the ironing later.
2. Tape six pieces of freezer paper to a cutting board, and your design on top.
If you're making six shirts, use six pieces of freezer paper. Make sure the wax side is down!
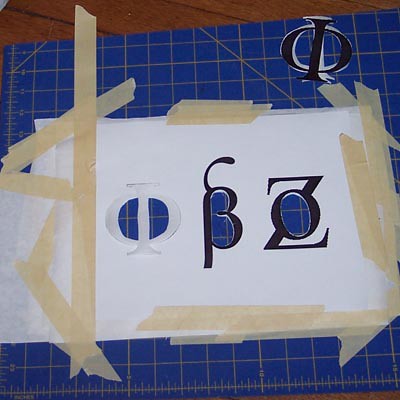
3. Cut out your design.
Using the X-Acto knife, remove all pieces of your design. With a sharp knife or razor, you can easily go through seven layers of paper.
4. Make sure you save any inner pieces, because you'll need them later to complete thhe stencils.
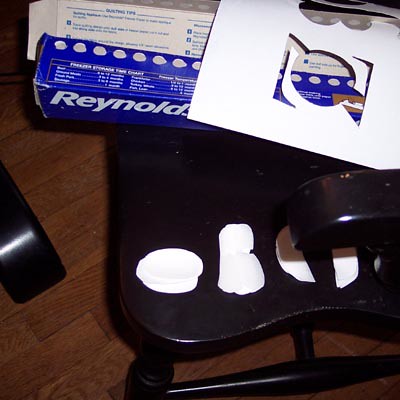
5. When the stencils are all cut out, remove them carefully from the cutting board and peel off all the tape that was sticking them down.
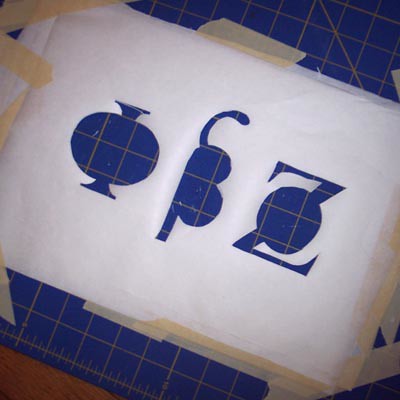
6. Lay one shirt on the ironing board and slide the piece of cardboard up inside it, under where you want the design to go. Iron the stencil on, wax side down, and make sure all little edges and bits are firmly ironed into place.
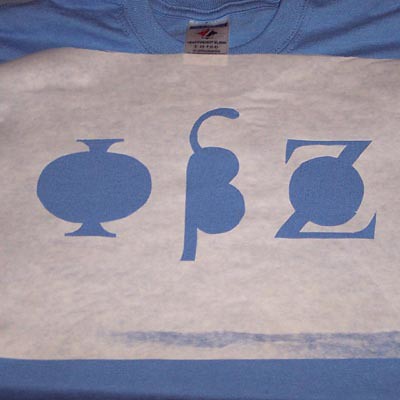
7. Now replace all the little inner bits and iron those down too.
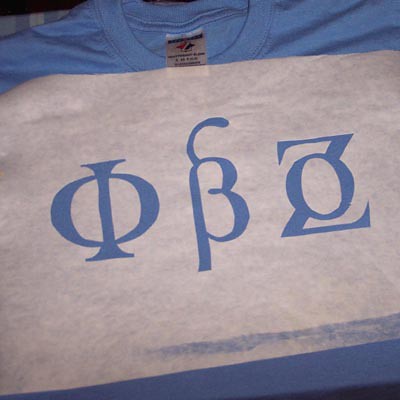
8. Paint over the stencil, and make sure every bit of exposed fabric gets fully covered. This is pretty much the only part the kids can help with in anything but an advisory position. You don't have to glop on a whole lot of paint, but use a stiff brush and work the paint down into the fibers.
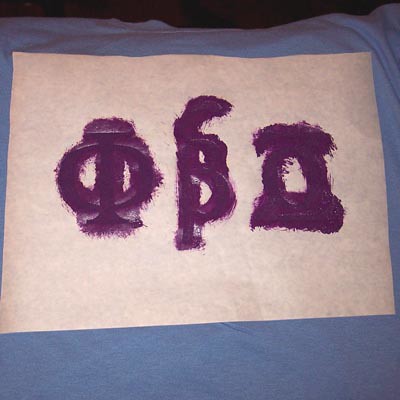
9. Peel up the stencil. Here, mine is peeled except for the inner bits.
10. Before washing this shirt, you should iron it to set the paint. Iron on the back, and put paper under the front so it doesn't get on your ironing board if it bleeds at all. Then you can wash it as usual!
Final product:
Labels: crafts, custom, homeschooling, projects, t-shirts
Sadie loves her leotards. She wants to wear one every day. When she's wearing some other vile outfit that doesn't qualify as a leotard, she says, with great pathos, "But MOMMY, now I not a ballewina!" Trying to convince her that being a ballewina starts in the heart and not in the closet is... not effective. She really thinks it starts in the closet.
When she first started ballet, I bought her one leotard. Insufficient! I bought a second leotard! Also insufficient! So I dragged my sorry carcass to Hancock fabrics and approached the aisle I'd never explored before -- the lycra and spandex aisle. The aisle of the lovely leotards. I told Sadie she could pick out her own leotard fabric, and she (predictably) chose the pink. I chose some other fabric too, kind of a mottled green/gold. Here's the one I made in my fabric:
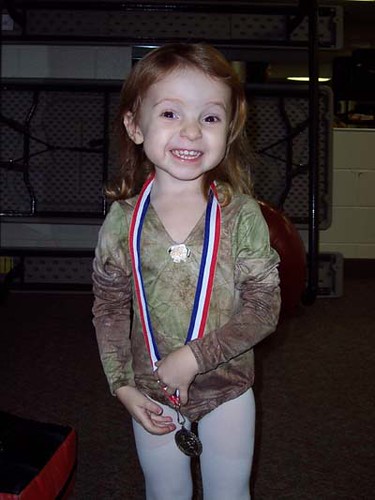
Not appropriate for ballet (pink only!) but she wears it to gymnastics.
Here's the one I made from her fabric:
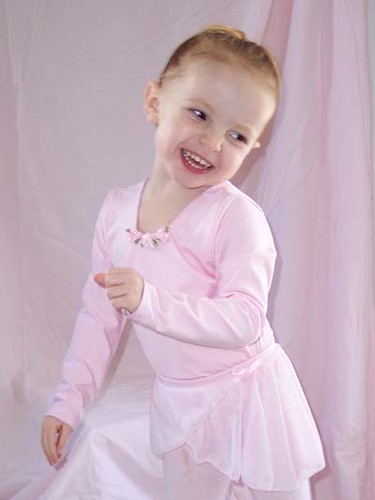
I actually made two of each fabric, both identical, so now she has six total, and she doesn't seem to run out as fast. Whew. Nice sewing, mom. But, let's be honest. Do you notice what both of these leotards (and by extension the others that I made) have in common? Little flowers at the neck? Yes, I explained that to myself by saying I intended to use those flowers, to make the pink leotard more like Kelly's leotard in "Barbie and the Nutcracker." In fact, I must admit, those flowers are there to hide the hideous gapping and puckering that happened when I was doing the neckline. And let's not even pretend that these leotards fit her. They are baggy in all the wrong places. Meaning all the places. As a leotard-ist, I have fallen short of the mark.
Now I have another chance to test my sewing skills. Ahno made Sadie this dress and bonnet to wear to Colonial Williamsburg:
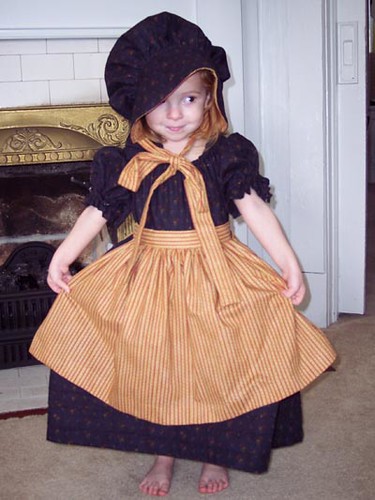
Awesome, right? I was so in love with the overall effect, and Sadie was so charmed with it too, that I borrowed the pattern and vowed to do the same style in all pink for her Easter dress.
Here we are on Easter Eve! I am not Ahno. I cannot do this shearing and keep it straight. I cannot do this gathering and keep it even. Yet, having set my task before me, I cannot at this hour run to Nordstrom and buy something respectable. I have to persevere. I'm sitting here with the dress done (sort of), the apron in pieces and the hat only a dull throb in my head.
Tune in tomorrow to see if I managed it...
I decided I needed to make a Teddy bear. This is something I haven't tried before, and I thought it would be fun for the kids and I to do this together.
First, I let the kids pick out the fabric. The fabric they chose is something *only* children would pick -- it has McDonald's logos and Ronald McDonald's face all over it in a bright red and yellow repeating pattern. It hardens your arteries just looking at it. Wow. If I were to make a bear using only my own asthetic choices... I would certainly have chosen something different. But hey.
Next, I found a pattern on the internet, and printed it out, enlarged it via eyeballing it, and drew it onto cardboard. Then I cut it out with my own gnarled arthritic fingers. I modified it a tiny bit -- added a gusset to the middle of the head, and changed the arm shape a little. The pattern I chose was the simplest one I could find.
The kids helped me lay out the pattern on the fabric, figure out how many pieces to cut, and trace it onto the fabric with a Sharpie. Then I cut it out. I wish I could have relinquished the scissors on this step but... sometimes you have to take a *little* control or they'll be sad with the final product with has radically different arms, no legs, and a hole in its stomach.
Benny helped run the sewing machine -- he does the foot pedal and I yell STOP! GO! SLOW! NO STOP! NO GO! and somehow we got the pieces together. Then I clipped the curves and they helped me turn and stuff it.
This was an exciting moment for them, because they could really visualize the end product. Benny really really wanted to sew with the real needle and thread and be in charge of closing up the openings. So I let him do one leg and one arm while I did the rest. It was so completely darling watching him bite his lip, wrinkle his forehead, and earnestly sew:

He also tried to do the head attachment, since I think he interpreted this as the most significant part (and it is!) but after wrestling with it for a while, he asked me to do it. After we were done, and before I sewed on the button eyes and embroidered the nose, I went upstairs to get Sadie dressed. As I was coming down the stairs, Benny reported cheerfully, "WELL! He's all decorated!" He had used the green Sharpie to draw on eyes, nose, claws, mouth, and a big giant S on his belly, with a green border.
I gulped down my "WHAT HAVE YOU DONE" and said, "What's the S for? Is it Superbear?"
"No," he said, "It's for Sadie. I made this bear for Sadie to have. That S tells her it's hers."
Well. Okay. So you can draw on your bear with a green Sharpie any time. And if you want to make it out of ridiculous McDonald's fabric, that's okay too. Just keep being such a sweetheart, and everything will be fine by me.

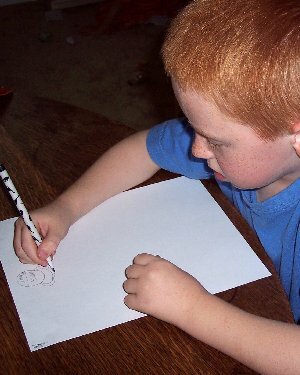
Now it's time to make your skeleton! You will need:
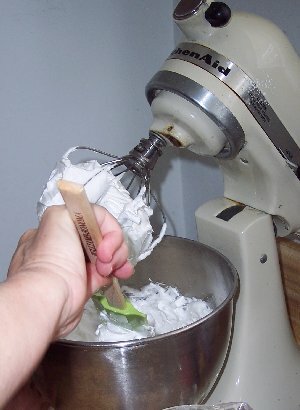
1. A good meringue recipe and this probably involves a mixer, unless you have a robotic superarm capable of creating "stiff peaks" in egg whites. You be the judge. Little confectioner's sugar, little egg white, around and around, and bam you have meringue.
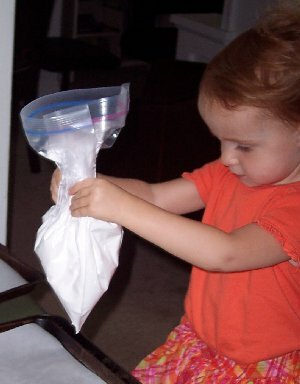
2. Large ziploc baggy. You'll need to cut a small hole in the very tip so you can squeeeeeeze out your meringue onto the cookie sheets.
3. A lot of cookie baking sheets and parchment paper. You can get parchment paper to line your cookie sheets in the baking section at the grocery store.
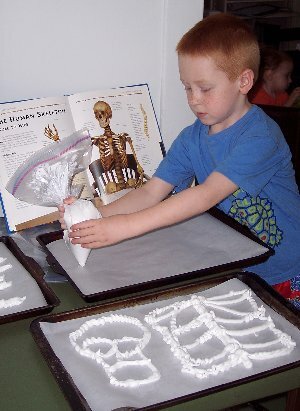
4. A large space to set out your skeleton when the pieces have finished baking!

A couple of hints:
If you do this on a humid day (like we did) your bones will soon be sticky (like ours were). This can work to your benefit if you want to connect them, but it can also get all over your fingers. You have been warned. They'll come out of the oven nice and crispy, and then gradually they'll start to kinda sweat. This of course will not bother the children at all.
Baked meringue is brittle, so make your bones thicker than you may think you need to make them. If you have leftover meringue, go back over the piece you've already made and thicken them up. For tiny bones like the phalanges and metacarpals and whatnot, it's easier to not make each individual bone, but rather make a little web with all the bones touching.
When you are removing the meringue from the parchment, pick it up and peel the paper off the bones, rather than trying to lift the bones off the flat paper. Some will break, and that's okay! When you lay them out, just lay the pieces together.
This skeleton is FAT FREE, in more ways than one. Enjoy!
homeschooling science anatomy cooking lesson plans
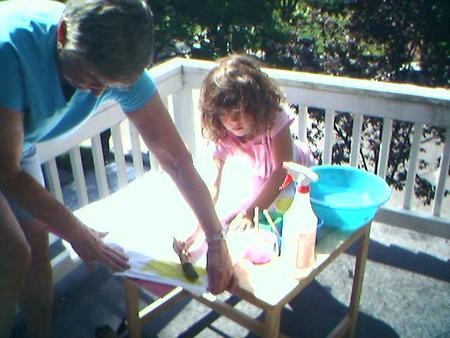
Mix the paint, schlop it onto the fabric any way you like, then lay down the shapes you want the sun to highlight. Leave the projects in the sun until they dry, and PRESTO you get lovely magic "prints." Benny and Irene made shirts for their dads for Father's Day, and the most amazing thing was that the little siblings (both 2 years old) got to paint too. Because you apply the colors with sponge brushes, and because it doesn't really matter where you put the paper shapes, the two year olds really got into the effort.
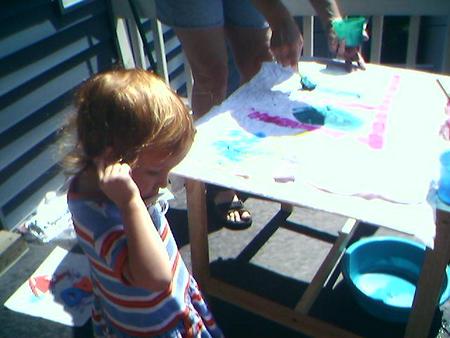
Finally, we found a use for our porch roof. After five years. A couple of tips from Nana: 1. Slip a garbage bag over a piece of foam board for a working surface. 2. After you're done painting, slip the garbage bag off and let the shirt dry on it. 3. Use a different garbage bag under each shirt. 4. Those sticky foam shapes work great for sharp, detailed prints. 5. Nana uses Setacolor Soleil paints, but you can also get a kit from Hearthsong or Klutz.
Nana sunprinted a giant piece of muslin, and then had the kids draw on it with Sharpies. We made a list to help them remember all the highlights of our visit together, and they drew scenes from it... from tubing on Broad Bay to Maymont Park in Richmond to the Fireworks at Harborfest. After the drawings were done, we all wrote our names on it, and we have a permanent record that could be made into a memory quilt for them.
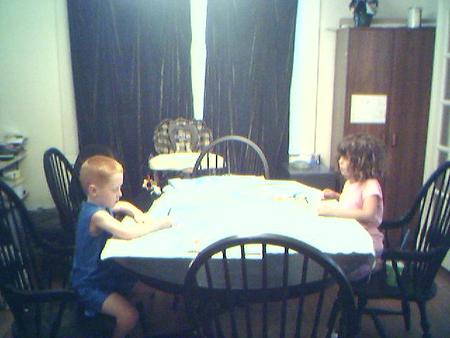
Naturally the little siblings got in on that end of it too. Who would pass up a chance to color with a Sharpie, that forbidden fruit of the craft cabinet top shelf!!! So a good time was had by all, thanks to Nana! Of course, on a rainy day, you're going to have to find something else to do. Like go to the aquarium... oh... wait... not that....


 Subscribe in a reader


