
My name is Lydia. I’m a homeschooling, minivan-driving, milk-pouring, toddler-wrangling, husband-pestering, dog-remonstrating mother of two, blogging about the stuff we do in Hampton Roads to educate our kids outside of school. Join us for the beach, the barn, the violin, the karate, the pool, the books, and the rest.
How to Make Custom T-Shirts at Home
Published Wednesday, May 02, 2007 by Lostcheerio.
So you want to make t-shirts, just a few, and you don't want to deal with the hassle and uncertainty of cafepress or maybe you need them *right stinking now* and you can't wait to order them online. Okay! I have your messy, irritating, dangerous answer! Aren't you glad you came to this blog?
I made six t-shirts for our small homeschool co-op with this method, and it worked great. I let Benny pick the color of the paint and Sadie pick the color of the shirt, but apart from that they weren't able to help too much because of the razors involved. Hey, you can't always make it a teaching moment. Especially when there are razors.
Supplies list:
T-shirts
Acrylic, permanent, unwashable paint
Paintbrush
Freezer Paper
Masking Tape
X-Acto knife
Iron and ironing board
Piece of cardboard as big as design
1. Make your design.
We named our co-op "Phi Bensa Zoe Academy" using our kids names to invent new and serious-sounding Greek letters. Then we invented the "new" Greek letters to go with, and that was the shirt. Whatever design you choose, print it out in black and white on a piece of paper. How complicated can it be? Depends how fussy you want to get with the cutting out and the ironing later.
2. Tape six pieces of freezer paper to a cutting board, and your design on top.
If you're making six shirts, use six pieces of freezer paper. Make sure the wax side is down!
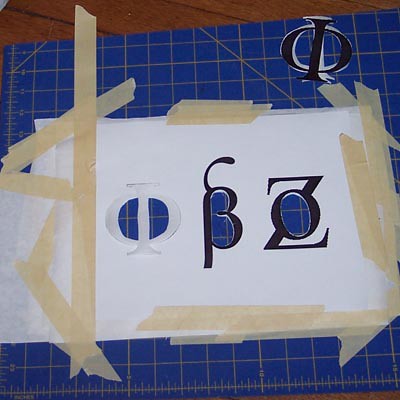
3. Cut out your design.
Using the X-Acto knife, remove all pieces of your design. With a sharp knife or razor, you can easily go through seven layers of paper.
4. Make sure you save any inner pieces, because you'll need them later to complete thhe stencils.
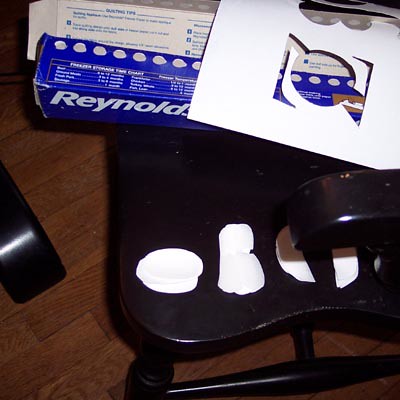
5. When the stencils are all cut out, remove them carefully from the cutting board and peel off all the tape that was sticking them down.
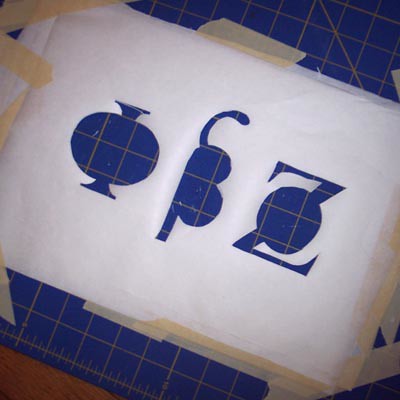
6. Lay one shirt on the ironing board and slide the piece of cardboard up inside it, under where you want the design to go. Iron the stencil on, wax side down, and make sure all little edges and bits are firmly ironed into place.
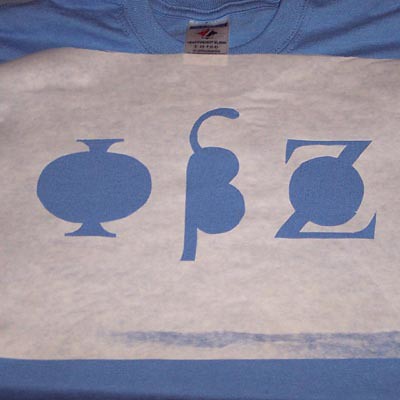
7. Now replace all the little inner bits and iron those down too.
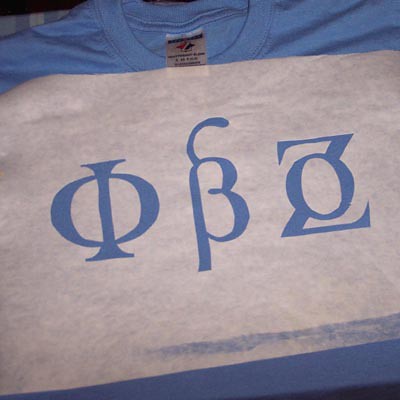
8. Paint over the stencil, and make sure every bit of exposed fabric gets fully covered. This is pretty much the only part the kids can help with in anything but an advisory position. You don't have to glop on a whole lot of paint, but use a stiff brush and work the paint down into the fibers.
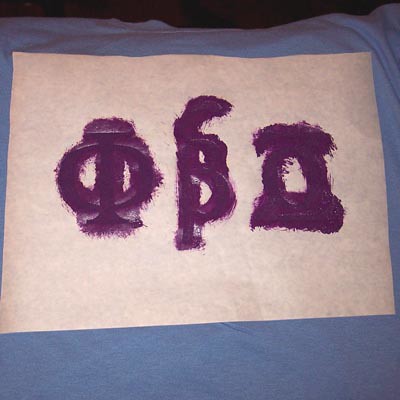
9. Peel up the stencil. Here, mine is peeled except for the inner bits.
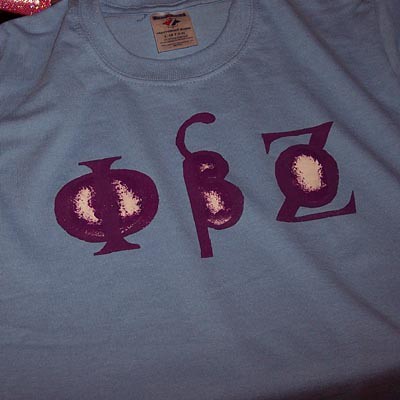
10. Before washing this shirt, you should iron it to set the paint. Iron on the back, and put paper under the front so it doesn't get on your ironing board if it bleeds at all. Then you can wash it as usual!
Final product:
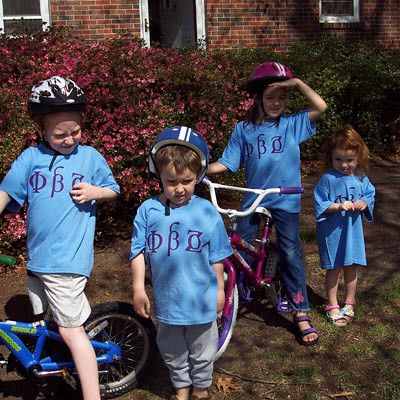
I made six t-shirts for our small homeschool co-op with this method, and it worked great. I let Benny pick the color of the paint and Sadie pick the color of the shirt, but apart from that they weren't able to help too much because of the razors involved. Hey, you can't always make it a teaching moment. Especially when there are razors.
Supplies list:
T-shirts
Acrylic, permanent, unwashable paint
Paintbrush
Freezer Paper
Masking Tape
X-Acto knife
Iron and ironing board
Piece of cardboard as big as design
1. Make your design.
We named our co-op "Phi Bensa Zoe Academy" using our kids names to invent new and serious-sounding Greek letters. Then we invented the "new" Greek letters to go with, and that was the shirt. Whatever design you choose, print it out in black and white on a piece of paper. How complicated can it be? Depends how fussy you want to get with the cutting out and the ironing later.
2. Tape six pieces of freezer paper to a cutting board, and your design on top.
If you're making six shirts, use six pieces of freezer paper. Make sure the wax side is down!
3. Cut out your design.
Using the X-Acto knife, remove all pieces of your design. With a sharp knife or razor, you can easily go through seven layers of paper.
4. Make sure you save any inner pieces, because you'll need them later to complete thhe stencils.
5. When the stencils are all cut out, remove them carefully from the cutting board and peel off all the tape that was sticking them down.
6. Lay one shirt on the ironing board and slide the piece of cardboard up inside it, under where you want the design to go. Iron the stencil on, wax side down, and make sure all little edges and bits are firmly ironed into place.
7. Now replace all the little inner bits and iron those down too.
8. Paint over the stencil, and make sure every bit of exposed fabric gets fully covered. This is pretty much the only part the kids can help with in anything but an advisory position. You don't have to glop on a whole lot of paint, but use a stiff brush and work the paint down into the fibers.
9. Peel up the stencil. Here, mine is peeled except for the inner bits.
10. Before washing this shirt, you should iron it to set the paint. Iron on the back, and put paper under the front so it doesn't get on your ironing board if it bleeds at all. Then you can wash it as usual!
Final product:
Labels: crafts, custom, homeschooling, projects, t-shirts
Benny's Book
Published Wednesday, March 21, 2007 by Lostcheerio. Benny wrote a story called Benny and Zoe for Reading Rainbow's "Young Writers and Illustrators" contest. I think, looking at his book, that Reading Rainbow will probably drop it out the window or possibly set it on fire, but I'm in love with it. Click here to see the full book on an extra-wide page.
Happy Tales Book Club Videos
Published Thursday, December 21, 2006 by Lostcheerio.
My friend Veronica and I have been having "Happy Tales Book Club" on the first Wednesday of every month at the Kempsville Library since last spring. Other people and other children have come and gone and come again and gone again, but our four kids are getting a lot out of the regular "stand up and speak" practice of giving book reports. Also we're learning different literary terms and doing little projects and whatnot. It's fun. Well, at our December meeting, Benny gave this report on the book "Fairy Houses":
Yes, I did get his hair cut a few days later. Hehehe.
Sadie gave this report on the book "The Christmas Cat":
Here's a transcript, for those who don't speak Sadie:
Sadie: Something something something, The Christmas Cat! Came to the forest! And then came through the forest!
Phillip: She's a baby.
Sadie: I'm not a baby, but I -
Benny: She's not really a baby.
Sadie; I'm not a baby; I'm a HUMAN.
Phillip: No.
Sadie: I am!
Phillip: You're not.
Sadie: I am! I am a human!
Phillip: No. You're a GIRL.
Sadie: I'm NOT.
Benny: She's a human girl.
Sadie: Something something something...
For us, it's a hilarious record of the way our kids interact at the moment, at this stage in their development. Both Phillip (3) and Sadie (2) are very interested in not being a baby. And Phillip is also interested in defining himself in the older group (with Benny and Zoe) and so wants to distance himself from the younger group (formerly himself and Sadie).
Anyway, this video got passed around to my friends and internet neighbors, and yesterday it got Boing-Boinged. Which led, no doubt, to the 30,000 hits. There are other reasons, like the word "heckler" in the title of the video -- that word is getting a lot of attention right now, from the Kramer episode. So that could account for a lot of it.
Wow, it's interesting having your child's book report seen by 30,000 people on the internet. I must tell you, and I'm sorry to tattle on humanity in this way, but I have to report that some people responded with nasty comments and one actually called my tiny 2 year old daugher "f**king retarded." I am as cynical and jaded as the next guy (well, okay, maybe I'm *not* as cynical and jaded as the next guy!) but that appalled even me. So I took that comment down. I'm as hot for free speech as the next guy (okay, again, maybe not) but after all, Benny could read that comment, and that's just not right.
Yes, I did get his hair cut a few days later. Hehehe.
Sadie gave this report on the book "The Christmas Cat":
Here's a transcript, for those who don't speak Sadie:
Sadie: Something something something, The Christmas Cat! Came to the forest! And then came through the forest!
Phillip: She's a baby.
Sadie: I'm not a baby, but I -
Benny: She's not really a baby.
Sadie; I'm not a baby; I'm a HUMAN.
Phillip: No.
Sadie: I am!
Phillip: You're not.
Sadie: I am! I am a human!
Phillip: No. You're a GIRL.
Sadie: I'm NOT.
Benny: She's a human girl.
Sadie: Something something something...
For us, it's a hilarious record of the way our kids interact at the moment, at this stage in their development. Both Phillip (3) and Sadie (2) are very interested in not being a baby. And Phillip is also interested in defining himself in the older group (with Benny and Zoe) and so wants to distance himself from the younger group (formerly himself and Sadie).
Anyway, this video got passed around to my friends and internet neighbors, and yesterday it got Boing-Boinged. Which led, no doubt, to the 30,000 hits. There are other reasons, like the word "heckler" in the title of the video -- that word is getting a lot of attention right now, from the Kramer episode. So that could account for a lot of it.
Wow, it's interesting having your child's book report seen by 30,000 people on the internet. I must tell you, and I'm sorry to tattle on humanity in this way, but I have to report that some people responded with nasty comments and one actually called my tiny 2 year old daugher "f**king retarded." I am as cynical and jaded as the next guy (well, okay, maybe I'm *not* as cynical and jaded as the next guy!) but that appalled even me. So I took that comment down. I'm as hot for free speech as the next guy (okay, again, maybe not) but after all, Benny could read that comment, and that's just not right.
Happy Tales Book Club Activity: Learning About Setting
Published Sunday, December 17, 2006 by Lostcheerio.
Here's a game we played in our homeschool book club to learn about setting!
You'll need:
Some cards printed with different things that might happen in a story. Here are mine:
A mouse squeaks : A policeman goes to work : An astronaut finds an enormous rock : A deer and a fox are friends : A tiger drinks from a muddy river : A bat sets a trap for a spider : A skydiver gets ready to jump : A taxi cab hurries at a green light : An alligator invites his friends to play : A family of birds get ready for Christmas : A monkey eats a banana : A shark talks to a clam : A father ties his son's shoes : A snake waits until later : A cat yawns : A cow eats dinner : A kid puts his shoes on : A little girl has a tea party : A king and a queen talk about their garden : a dog finds a hidden ball in a bush : A princess loses her crown : A mother pig teachers her baby to sing.
Now you need "flags" printed with different settings. I made mine by writing the settings on half-sheets of paper and then taping each one to a straw. Here are my settings:
In a cave : In the ocean : In the city : In a tree : In a barn : On an airplane : In a castle : In the jungle : In a back yard : In a house : In the woods : On the moon
Obviously you can think of a lot more, and if you have lots more kids, you need at least one flag for every kid, or a correct number of flags if they're going to have more than one each.

The reader sits on a chair with the plot cards and everyone else forms a semi-circle around the chair, holding their flags. The reader reads the cards one at a time, and if you think you have a flag that could be a setting for that action, you hold it up. Let the kids take turns being the reader, and take turns with the different flags.
This isn't a win/lose game, but it's a good way to talk about setting, and also led us to an interesting discussion about fantasy and reality, as we could think of ways that a cow could eat dinner in a house, or in a castle, or on the moon. No right or wrong answers. The kids also wanted to make up their own settings and their own plot cards, so it was good to have a couple extra flags and cards to use.
Have fun!
homeschooling games reading setting lesson
You'll need:
Some cards printed with different things that might happen in a story. Here are mine:
A mouse squeaks : A policeman goes to work : An astronaut finds an enormous rock : A deer and a fox are friends : A tiger drinks from a muddy river : A bat sets a trap for a spider : A skydiver gets ready to jump : A taxi cab hurries at a green light : An alligator invites his friends to play : A family of birds get ready for Christmas : A monkey eats a banana : A shark talks to a clam : A father ties his son's shoes : A snake waits until later : A cat yawns : A cow eats dinner : A kid puts his shoes on : A little girl has a tea party : A king and a queen talk about their garden : a dog finds a hidden ball in a bush : A princess loses her crown : A mother pig teachers her baby to sing.
Now you need "flags" printed with different settings. I made mine by writing the settings on half-sheets of paper and then taping each one to a straw. Here are my settings:
In a cave : In the ocean : In the city : In a tree : In a barn : On an airplane : In a castle : In the jungle : In a back yard : In a house : In the woods : On the moon
Obviously you can think of a lot more, and if you have lots more kids, you need at least one flag for every kid, or a correct number of flags if they're going to have more than one each.
The reader sits on a chair with the plot cards and everyone else forms a semi-circle around the chair, holding their flags. The reader reads the cards one at a time, and if you think you have a flag that could be a setting for that action, you hold it up. Let the kids take turns being the reader, and take turns with the different flags.
This isn't a win/lose game, but it's a good way to talk about setting, and also led us to an interesting discussion about fantasy and reality, as we could think of ways that a cow could eat dinner in a house, or in a castle, or on the moon. No right or wrong answers. The kids also wanted to make up their own settings and their own plot cards, so it was good to have a couple extra flags and cards to use.
Have fun!
homeschooling games reading setting lesson
Buzz Lightyear To The Rescue
Published Friday, September 08, 2006 by Lostcheerio.
Today's blog entry is at my official homeschooling blog on the web site of the local newspaper, and it's about using Buzz Lightyear obsession to weasel the child into really vigorous violin practice. Go, Evil Emperor Mommyzurg!
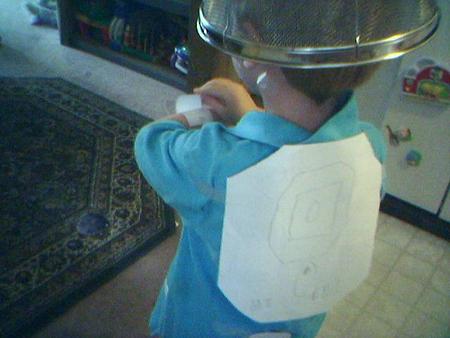
Here is the link.
Here is the link.
Suzuki Violin at the Beach
Published Tuesday, August 29, 2006 by Lostcheerio.
Some people take summer lessons. Some people take the summer off. This year we didn't take any summer lessons, and I also didn't practice Benny too rigorously. I had several reasons.
One reason is that the sooner we get to Book 3, the sooner we get out of Book 3 and have to find a new teacher. I never want to find a new teacher, therefore I am not eager to get into or out of Book 3. I want to stay with Mrs. Ford forever, even if it means that Benny is playing Go Tell Aunt Rhody when he goes off to college. I don't care. No one else understands the subtle nuances of teaching Benny. Ahem. I know that sounds preposterous. I don't care. I'm not in a hurry for Book 3 to come and go, and I'm not ashamed. I have my heels planted.
Another reason was that in all the preparation for the final recital, and with the fifty day challenge and everything, Benny had lost a little of his enthusiasm for playing, and practicing was becoming too challenging. I was having to bribe him a little too much, and I like him to be more self-motivated. So, I backed off, to give him a chance to step up.
The last reason was that we were travelling, thinking about other things, concentrating on plyaing on the beach and feeding chickens at the farm and riding bikes and stuff like that.
In my opinion, the break in intensity paid off, big time.
For one thing, Benny's tone has improved enormously. I don't know whether it's because he's playing with more genuine enthusiasm, or whether he has grown physically to the point where he can handle his violin better. He just seems to have a bigger and more confident sound in general. Check out this bow hold:
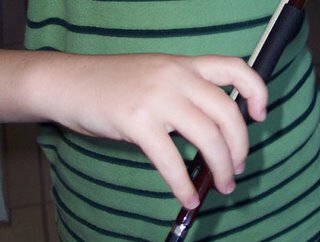
I spent most of the month of May telling him to keep his pinky on top. In fact, the words, "Pinky on top" were so familiar in my mouth that sometimes I was awakened at three o'clock in the morning by my own repetitive muttering. Now the pinky is on top, magically, of its own free will.
On the topic of enthusiasm... let me show you this:
=
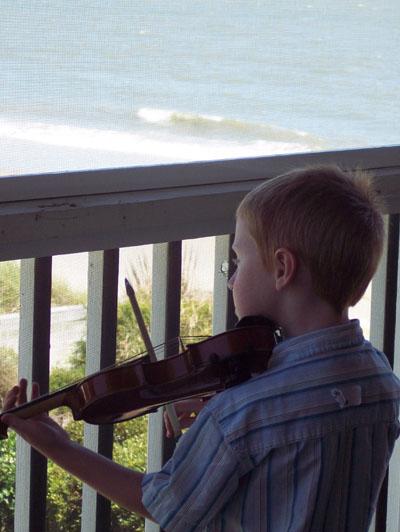
Benny gives a daily concert off the back porch of this beach condo, to the people in the pool. He has written programs for this, and announces it in a very grand and officious way. He runs through most of his Suzuki Book 2 repetoire on a daily basis. And he LOVES it. How can I, watching this, really get tough with him on whether something was sufficiently staccato or whether an up bow was really a down bow? I have just decided to enjoy the show instead. When we get back, Mrs. Ford can sort him out. And if it takes her all year... so much the better!
One reason is that the sooner we get to Book 3, the sooner we get out of Book 3 and have to find a new teacher. I never want to find a new teacher, therefore I am not eager to get into or out of Book 3. I want to stay with Mrs. Ford forever, even if it means that Benny is playing Go Tell Aunt Rhody when he goes off to college. I don't care. No one else understands the subtle nuances of teaching Benny. Ahem. I know that sounds preposterous. I don't care. I'm not in a hurry for Book 3 to come and go, and I'm not ashamed. I have my heels planted.
Another reason was that in all the preparation for the final recital, and with the fifty day challenge and everything, Benny had lost a little of his enthusiasm for playing, and practicing was becoming too challenging. I was having to bribe him a little too much, and I like him to be more self-motivated. So, I backed off, to give him a chance to step up.
The last reason was that we were travelling, thinking about other things, concentrating on plyaing on the beach and feeding chickens at the farm and riding bikes and stuff like that.
In my opinion, the break in intensity paid off, big time.
For one thing, Benny's tone has improved enormously. I don't know whether it's because he's playing with more genuine enthusiasm, or whether he has grown physically to the point where he can handle his violin better. He just seems to have a bigger and more confident sound in general. Check out this bow hold:
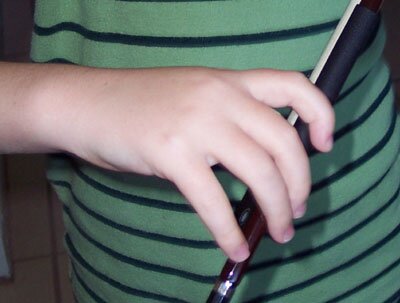
I spent most of the month of May telling him to keep his pinky on top. In fact, the words, "Pinky on top" were so familiar in my mouth that sometimes I was awakened at three o'clock in the morning by my own repetitive muttering. Now the pinky is on top, magically, of its own free will.
On the topic of enthusiasm... let me show you this:
=
Benny gives a daily concert off the back porch of this beach condo, to the people in the pool. He has written programs for this, and announces it in a very grand and officious way. He runs through most of his Suzuki Book 2 repetoire on a daily basis. And he LOVES it. How can I, watching this, really get tough with him on whether something was sufficiently staccato or whether an up bow was really a down bow? I have just decided to enjoy the show instead. When we get back, Mrs. Ford can sort him out. And if it takes her all year... so much the better!
Human Anatomy Lesson: Bodies on the Beach
Published Monday, August 28, 2006 by Lostcheerio.
You will need one beach, one stick, and one little sister.
Draw a HUUUUGE human body outline, the biggest you can possibly imagine. Now fill in all the organs and parts you know, and label it until it becomes tiresome. Then run away into the ocean and have your sister show off your work to the camera.
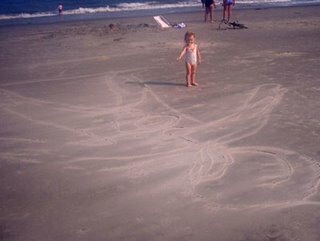
Draw a HUUUUGE human body outline, the biggest you can possibly imagine. Now fill in all the organs and parts you know, and label it until it becomes tiresome. Then run away into the ocean and have your sister show off your work to the camera.

Notice of Intent
Published Friday, August 04, 2006 by Lostcheerio.
Please go read my "Notice of Intent to Homeschool" post on my official homeschooling blog on the local paper's web site. It's right here. I talked about what I said and what I really wanted to say. :D

Human Anatomy Lesson: Blank Kids
Published by Lostcheerio.
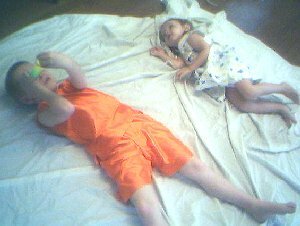
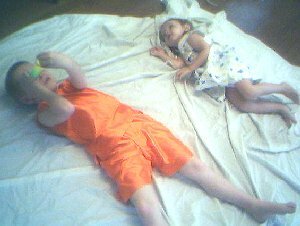
This is a very simple project that my children really liked. The idea is to make a blank life-sized "kid" that you can label with all the parts of the human body that you know. We called them flat kids (not to be confused with Flat Stanley, who is actually flat, and a whole different thing) and before we labelled them all up, we dressed them for this photo shoot:
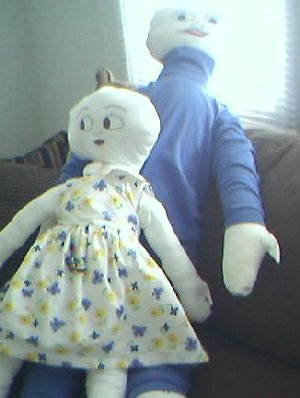
You'll need a large piece (as large as your child) of fabric that's white or beige, or tan, or pink, or any color you can label with markers. We used some old bed sheets. Double up the fabric and try to smooth all the wrinkles out of it, so you have a front and back for your flat kid. Have your child lie down on the fabric and position his arms and legs kind of like a paper doll. Then draw around him, leaving lots of extra room. Make the head bigger and rounder, and don't make the crotch come to a point -- make it more of a gentle arc. :)
Cut out on the line, or have your child cut it out if he's adept with the fabric scissors. Then sew it up, leaving a space at the waist for turning and stuffing. Clip the seam allowance at the curves and trim around the points so it looks smooth when you turn and stuff. Then... you guessed it... turn and stuff! :)
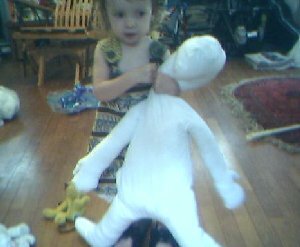
When you've stuffed it (you'll need about one bag of stuffing for each foot your child is tall), stitch up the hole at the waist. At this point I put faces on ours, so they didn't look so creepy (to me). You could also add hair -- I am meaning to do this but haven't yet. Get out the Sharpies! It's time for permanent marker fun! Wheeee!!!
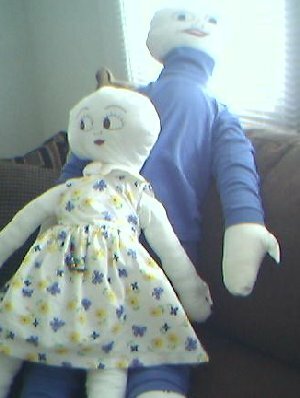
My two-year-old daughter did not want to label hers, so we left her dressed and she sleeps in Sadie's bed with her. My son, however, was eager to label "Flat Benny" with all his parts, so we did one side the skeletal system and one side everything else we've learned so far (digestive, respiratory, circulatory, etc).
Now Benny sleeps with his flat Benny too! Kind of like a body pillow but educational, and with a urinary tract drawn in excruitiating detail. :)
You'll need a large piece (as large as your child) of fabric that's white or beige, or tan, or pink, or any color you can label with markers. We used some old bed sheets. Double up the fabric and try to smooth all the wrinkles out of it, so you have a front and back for your flat kid. Have your child lie down on the fabric and position his arms and legs kind of like a paper doll. Then draw around him, leaving lots of extra room. Make the head bigger and rounder, and don't make the crotch come to a point -- make it more of a gentle arc. :)
Cut out on the line, or have your child cut it out if he's adept with the fabric scissors. Then sew it up, leaving a space at the waist for turning and stuffing. Clip the seam allowance at the curves and trim around the points so it looks smooth when you turn and stuff. Then... you guessed it... turn and stuff! :)
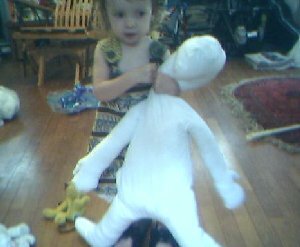
When you've stuffed it (you'll need about one bag of stuffing for each foot your child is tall), stitch up the hole at the waist. At this point I put faces on ours, so they didn't look so creepy (to me). You could also add hair -- I am meaning to do this but haven't yet. Get out the Sharpies! It's time for permanent marker fun! Wheeee!!!
My two-year-old daughter did not want to label hers, so we left her dressed and she sleeps in Sadie's bed with her. My son, however, was eager to label "Flat Benny" with all his parts, so we did one side the skeletal system and one side everything else we've learned so far (digestive, respiratory, circulatory, etc).

Now Benny sleeps with his flat Benny too! Kind of like a body pillow but educational, and with a urinary tract drawn in excruitiating detail. :)

Drawstring Pouch Instruction
Published Wednesday, August 02, 2006 by Lostcheerio.
I've been making little pouches for the items we find in geocaches, like travel bugs and geocoins and whatnot. Of course you could use these little bags for any old thing you wanted, including hiding prizes, hoarding treasure, or delivering cake. Of course, the cake thing might not work out so well, what with fabric being permeable by frosting. But you could try.
I made a few with buttons:
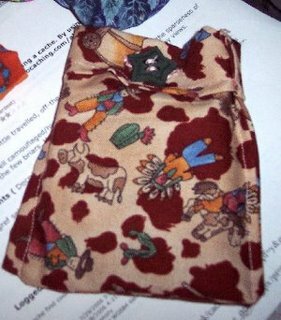
I really wanted to do a drawstring one though. Today I did manage a drawstring one with help from Nico at It's Your Life. I didn't exactly follow her directions but the pictures helped me finally figure out what the heck I was supposed to do with that lousy drawstring channel.
Here's my drawstring pouch:
It's just what I wanted. The Frog Log travel bug is going in it and going to Nevada, although I'm not sure the other travel bug I sent out there ever made it. Mental note: Call Kristen.
Here are *my* directions, unhelpfully unillustrated in ten steps each:
Button:
1. Cut two rectangles about as wide and more than twice as high as you want your bag to finish.
2. Sew up the side seams on each rectangle, so you end up with two little pockets.
3. Turn one right side out and tuck it down inside the other one, so the right sides are together.
4. Sew around the top where the raw edges are, leaving an inch to turn.
5. Turn it all right side out and stuff the lining down inside the bag.
6. Fold it down once, and topstitch around the top edge, enclosing the part where you left it open to turn.
7. Put a button on the inside of the back and a buttonhole on the front -- BANG you're done.
8. Smile warmly.
9. Pat yourself on the back.
10. Call your mother and congratulate her for raising such a fine child.
Drawstring:
1. Cut two rectangles just as wide and twice as high as you want your bag to finish.
2. Sew up the side seams on each rectangle, so you end up with two little pockets.
3. Turn one right side out and tuck it down inside the other one, so the right sides are together.
4. Cut another rectangle, about 3 inches wide and long enough to go ALMOST all the way around the top of your bag.
5. Hem the short ends of it a little big.
6. Fold it over, wrong sides together, and tuck it down between the two layers of bag that you already have.
7. Sew through all four layers, leaving one inch to turn.
8. Turn it all right side out and stuff the lining down inside the bag.
9. Topstitch around under the drawstring channel, capturing the little edges where you left it open to turn.
10. Stick a safety pin on one end of a ribbon and pull it through -- BANG. Done.
I made a few with buttons:
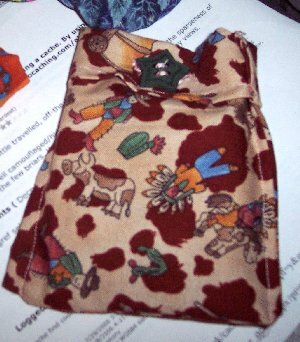
I really wanted to do a drawstring one though. Today I did manage a drawstring one with help from Nico at It's Your Life. I didn't exactly follow her directions but the pictures helped me finally figure out what the heck I was supposed to do with that lousy drawstring channel.
Here's my drawstring pouch:

It's just what I wanted. The Frog Log travel bug is going in it and going to Nevada, although I'm not sure the other travel bug I sent out there ever made it. Mental note: Call Kristen.
Here are *my* directions, unhelpfully unillustrated in ten steps each:
Button:
1. Cut two rectangles about as wide and more than twice as high as you want your bag to finish.
2. Sew up the side seams on each rectangle, so you end up with two little pockets.
3. Turn one right side out and tuck it down inside the other one, so the right sides are together.
4. Sew around the top where the raw edges are, leaving an inch to turn.
5. Turn it all right side out and stuff the lining down inside the bag.
6. Fold it down once, and topstitch around the top edge, enclosing the part where you left it open to turn.
7. Put a button on the inside of the back and a buttonhole on the front -- BANG you're done.
8. Smile warmly.
9. Pat yourself on the back.
10. Call your mother and congratulate her for raising such a fine child.
Drawstring:
1. Cut two rectangles just as wide and twice as high as you want your bag to finish.
2. Sew up the side seams on each rectangle, so you end up with two little pockets.
3. Turn one right side out and tuck it down inside the other one, so the right sides are together.
4. Cut another rectangle, about 3 inches wide and long enough to go ALMOST all the way around the top of your bag.
5. Hem the short ends of it a little big.
6. Fold it over, wrong sides together, and tuck it down between the two layers of bag that you already have.
7. Sew through all four layers, leaving one inch to turn.
8. Turn it all right side out and stuff the lining down inside the bag.
9. Topstitch around under the drawstring channel, capturing the little edges where you left it open to turn.
10. Stick a safety pin on one end of a ribbon and pull it through -- BANG. Done.
Life in the Country
Published Tuesday, August 01, 2006 by Lostcheerio.
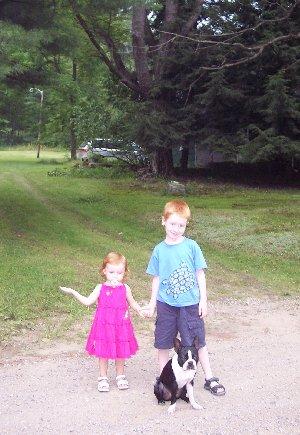
We recently returned from a vacation in the country. I just posted an article on my official homeschooling blog at the local paper's web site, about how being there allowed me to release a little of my strangle hold on Benny's safety and well being, and trust him the tiniest bit to not immediately die if I'm not watching him.
Skeleton Lesson: Meringue Bones
Published by Lostcheerio.
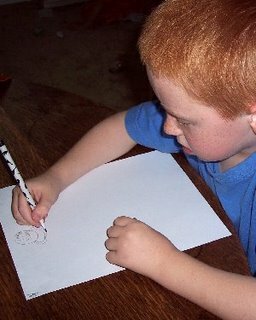
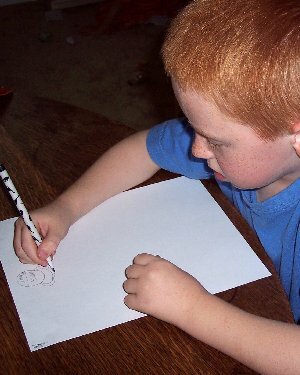
The first thing you should do is sit down and write down all the bones you know, and draw a picture of the skeleton. You'll need to think about scale when you're making your meringue bones.
Now it's time to make your skeleton! You will need:
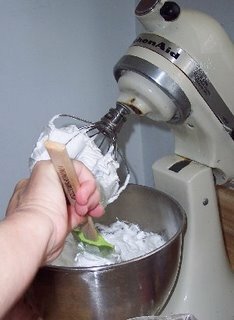
1. A good meringue recipe and this probably involves a mixer, unless you have a robotic superarm capable of creating "stiff peaks" in egg whites. You be the judge. Little confectioner's sugar, little egg white, around and around, and bam you have meringue.
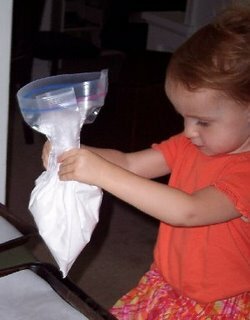
2. Large ziploc baggy. You'll need to cut a small hole in the very tip so you can squeeeeeeze out your meringue onto the cookie sheets.
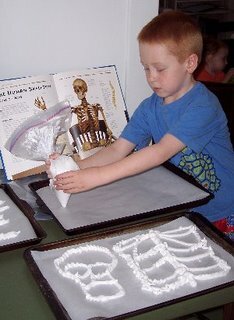
3. A lot of cookie baking sheets and parchment paper. You can get parchment paper to line your cookie sheets in the baking section at the grocery store.
4. A large space to set out your skeleton when the pieces have finished baking!

A couple of hints:
If you do this on a humid day (like we did) your bones will soon be sticky (like ours were). This can work to your benefit if you want to connect them, but it can also get all over your fingers. You have been warned. They'll come out of the oven nice and crispy, and then gradually they'll start to kinda sweat. This of course will not bother the children at all.
Baked meringue is brittle, so make your bones thicker than you may think you need to make them. If you have leftover meringue, go back over the piece you've already made and thicken them up. For tiny bones like the phalanges and metacarpals and whatnot, it's easier to not make each individual bone, but rather make a little web with all the bones touching.
When you are removing the meringue from the parchment, pick it up and peel the paper off the bones, rather than trying to lift the bones off the flat paper. Some will break, and that's okay! When you lay them out, just lay the pieces together.
This skeleton is FAT FREE, in more ways than one. Enjoy!
homeschooling science anatomy cooking lesson plans
Now it's time to make your skeleton! You will need:
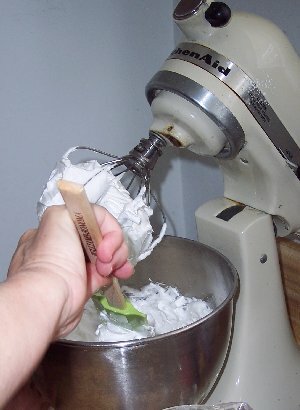
1. A good meringue recipe and this probably involves a mixer, unless you have a robotic superarm capable of creating "stiff peaks" in egg whites. You be the judge. Little confectioner's sugar, little egg white, around and around, and bam you have meringue.
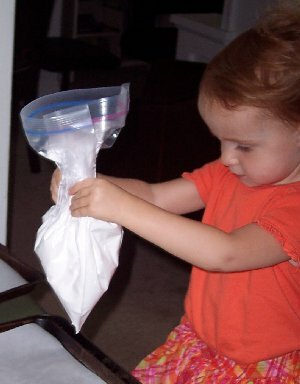
2. Large ziploc baggy. You'll need to cut a small hole in the very tip so you can squeeeeeeze out your meringue onto the cookie sheets.
3. A lot of cookie baking sheets and parchment paper. You can get parchment paper to line your cookie sheets in the baking section at the grocery store.
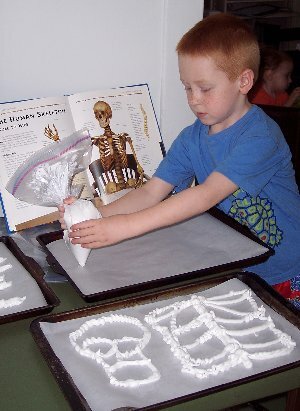
4. A large space to set out your skeleton when the pieces have finished baking!
A couple of hints:
If you do this on a humid day (like we did) your bones will soon be sticky (like ours were). This can work to your benefit if you want to connect them, but it can also get all over your fingers. You have been warned. They'll come out of the oven nice and crispy, and then gradually they'll start to kinda sweat. This of course will not bother the children at all.
Baked meringue is brittle, so make your bones thicker than you may think you need to make them. If you have leftover meringue, go back over the piece you've already made and thicken them up. For tiny bones like the phalanges and metacarpals and whatnot, it's easier to not make each individual bone, but rather make a little web with all the bones touching.
When you are removing the meringue from the parchment, pick it up and peel the paper off the bones, rather than trying to lift the bones off the flat paper. Some will break, and that's okay! When you lay them out, just lay the pieces together.
This skeleton is FAT FREE, in more ways than one. Enjoy!
homeschooling science anatomy cooking lesson plans
Art Museum Post
Published Thursday, July 27, 2006 by Lostcheerio.
Another post about the art museum on my "official" homeschooling blog on the Virginian Pilot Online web site... this one about the exhibit, "Masterpieces from an English Country House: The Fitzwilliam Collection." How to prep your kids for stuff they'll see, what to talk about afterward, etc. Do not miss the giant Audobon!

Here's my newspaper blog.
Here's my newspaper blog.
Human Body: In Benny's Words
Published Tuesday, July 25, 2006 by Lostcheerio.
Well, I asked him to teach me what he knows:
First your food goes in the mouth and you crunch it up small enough to swallow. Then, you get it down into the esophagus. It's something you push, push, push, push down into the stomach. The stomach can drift down into the small intestine. Now the small intestine is a river that flows to the large intestine. The large intestine is so stinky! Because there's POOP inside! Back to the stomach. We'll teach you that the stomach can let everything down to the liquid part of feel. In the small intestine, the food will be soaked up into villi. It gets delivered to all parts of the body in veins and with arteries. What gets sucked out in the large intestine is water. The extra water goes into the tube, gets through the kidneys, and then it goes into the bladder. When that happens, you start to tinkle. Even the food in the large intestine can get pushed out of your body too. But when that happens, that is not tinkle. It's... POOP!
Here in the breathing, your air goes down the trachea, which is not like the esophagus, as the esophagus pushes it down, and the trachea doesn't push the air down. You breathe, and the trachea blows it down like the three little pigs. Like the wolf blows down their houses. Like it does to the trachea, as it blows the air down into the body. And the part in the body that it goes into is the lungs. And there's another part of the body that's air. It's red and it's liquid. When you get a cut, you'll see it bleeding sometimes and you'll see some scrapes sometimes. And you can not see it when you don't have any cuts. It's about the good blood and the bad blood. And there's the heart. First, the bad blood goes into the heart, and then it goes into good blood. What helps it is the lungs. And then it comes out of the heart, and then it comes into the body!
And there's something else about the digestive system. Girls have three holes, and the boys have two holes. Both the boys' holes are to the digestive system. And the girls don't have all their holes to the digestive system. They just have one hole to the reproductive system. The reproductive is where the baby comes out. You'll see it so tiny, the size of a baby dolly. And they have just two holes to the digestive system.
First your food goes in the mouth and you crunch it up small enough to swallow. Then, you get it down into the esophagus. It's something you push, push, push, push down into the stomach. The stomach can drift down into the small intestine. Now the small intestine is a river that flows to the large intestine. The large intestine is so stinky! Because there's POOP inside! Back to the stomach. We'll teach you that the stomach can let everything down to the liquid part of feel. In the small intestine, the food will be soaked up into villi. It gets delivered to all parts of the body in veins and with arteries. What gets sucked out in the large intestine is water. The extra water goes into the tube, gets through the kidneys, and then it goes into the bladder. When that happens, you start to tinkle. Even the food in the large intestine can get pushed out of your body too. But when that happens, that is not tinkle. It's... POOP!
Here in the breathing, your air goes down the trachea, which is not like the esophagus, as the esophagus pushes it down, and the trachea doesn't push the air down. You breathe, and the trachea blows it down like the three little pigs. Like the wolf blows down their houses. Like it does to the trachea, as it blows the air down into the body. And the part in the body that it goes into is the lungs. And there's another part of the body that's air. It's red and it's liquid. When you get a cut, you'll see it bleeding sometimes and you'll see some scrapes sometimes. And you can not see it when you don't have any cuts. It's about the good blood and the bad blood. And there's the heart. First, the bad blood goes into the heart, and then it goes into good blood. What helps it is the lungs. And then it comes out of the heart, and then it comes into the body!
And there's something else about the digestive system. Girls have three holes, and the boys have two holes. Both the boys' holes are to the digestive system. And the girls don't have all their holes to the digestive system. They just have one hole to the reproductive system. The reproductive is where the baby comes out. You'll see it so tiny, the size of a baby dolly. And they have just two holes to the digestive system.
About me

I write a homeschooling blog for my local newspaper, The Virginian Pilot. This blog is for posts I don't particularly want the paper to own, like lesson ideas, project directions, and secret plans for world domination. Visit my official homeschooling blog for field trips, book reviews, pontifications, and daily life.
- I'm Lostcheerio
- From VA,
- My profile